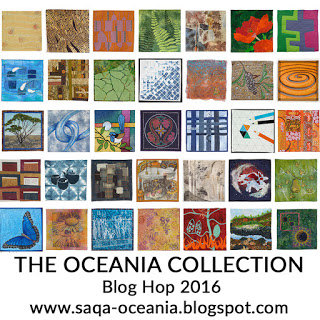
Studio Art Quilt Associates (SAQA) runs a annual Benefit Auction. This auction consists of 12 x 12 quilts made by member from all around the world. This year 36 members from the Oceania region submitted quilts. These have been brought together in the Oceania Collection.
In the weeks leading up the start of the Auction (16 September) 16 Oceania members are posting blog entries about how they made their quilts and maybe they will share a lillte of the inspirations that guided them in their choices.
The Oceania Blog has a full list of all participants in the blog hop!
I do hope you enjoy seeing my process.

This is my contribution to the 2016 SAQA Auction. I think it is the 4th time I have contributed. Sadly, I didn't photograph the process as I made this little 12 x 12 quilt. I decided that I would make a second to show the process.

The background fabric isn't the same colour but I couldn't find anything closer in my stash.

Firstly, I printed text, in gold all over the fabric, using one of my thermofax screens. I did this very roughly, just for texture. The text is a letter written to my Grandmother from her fiance in Egypt, just before he left for Gallopolli during WWI.

I cut the fabric, roughly to size (about 13.5 inches square).

Next came the seed heads in white (another thermofax screen - this is one that I drew).

The next layer was the scary one. If I botched this I was going to have to start again. This is a homemade stencil of a pear. I cut the stencil from an overhead projector sheet (acrylic).

Phew! It worked. Not a smudge in sight!

After the black ink was dry (with a little help from the hair dryer), I repositioned the stencil to just overlap the black.

This didn't smudge either.

Now for my little flying pears. On the original quilt I printed these pears using my little wooden print block but I have put it away so carefully I couldn't find it so I have had to use another thermofax. I am not as happy with the result.. The wood block gives a much sharper print.

Now to the sewing machine. I sandwiched the quilt using bamboo wadding. I want the pear to bulge so I have started quilting by outlining it'

I then stitched the seed head in white and heavily stippled the background used a brown to green variegated thread. finally I stitched the flying pears in black.

Gold paint applied to the flying pears to give them a little character.

I do get a little nervous when I do this. I cut a slit in the back of the pear and gently stuffed it with carded merino wool.

I stitched the cut back together with a running stitch.

I painted the pear with fabric paints and shiva stiks (Shiva to give a gentle sheen).

I added a facing (I wont show the photo I took of the facing on the wrong side of the quilt!) A little unsewing ensured.

The finished quilt. It isn't quiet the same as the quilt that is in the auction but the process was the same.
The next quilter to post in this blog hop is Alison Schwabe.
I hop you have enjoyed watching how I worked this little quilt.
Hugz
Sally

3 comments:
Even the 2nd one is beautiful, Sally!!! so nice of you to share your process!!! And see you blogging again!! HA
It's a lovely quilt Sally & I enjoyed reading about the process of making it.
I also loved reading about how you made your quilt. I was amazed at how well the paint enhanced the pear. That's for the great step by step process.
Post a Comment